Bootstrap Textarea Group

Overview
In the pages we make we employ the form components in order to get certain relevant information from the visitors and send it back to the website founder completing different purposes. To carry out it effectively-- suggesting obtaining the correct replies, the right questions have to be asked so we architect out forms construction with care, considering of all the attainable circumstances and forms of information required and possibly delivered.
And yet no matter exactly how correct we are in this, there certainly typically are some instances when the information we desire from the site visitor is instead blurry right before it gets in fact offered and needs to spread over a whole lot more than just the normal a single or else a number of words typically written in the input fields. That is definitely where the # element shows up-- it's the only and irreplaceable component in which the visitors may freely write back several lines providing a reviews, providing a purpose for their activities or just a couple of ideas to ideally aid us producing the product or service the page is about much better.
Steps to apply the Bootstrap textarea:
Within the latest version of the most well-known responsive framework-- Bootstrap 4 the Bootstrap Textarea Working element is completely maintained automatically adapting to the size of the display screen webpage becomes presented on.
Making it is pretty uncomplicated - everything you need is a parent wrapper <div> element possessing the .form-group class used. Inside it we have to set a label for the <textarea> component possessing the for = “ - the textarea ID - " and appropriate subtitle in order to keep it convenient for the user to comprehend what type of info you would require written in.
Next we ought to produce the <textarea> element in itself-- select it the .form-control class and an appropriate ID. Do note the ID you have appointed into the for = "" attribute supposing that the previous <label> should really fit the one to the <textarea> element. You should also add a rows=" ~ number ~ " attribute in order to establish the lines the <textarea> will actually spread when it gets featured when the page initially loads-- 3 to 5 is a nice value for this one since if the text becomes excessive the individual can easily constantly resize this control with dragging or simply employ the inner scrollbar showing up when text gets too much.
Since this is certainly a responsive element by default it spreads out the whole width of its parent component.
Extra hints
On the other side of coin-- there are several scenarios you would wish to control the feedback delivered inside a <textbox> to a specific length in characters-- assuming that this is your case you should in addition put in a maxlenght = " ~ some number here ~ " attribute establishing the characters control you need-- do keep in mind carefully even though if the limitation you set will suffice for the info you need to be composed appropriately and specificed enough-- keep in mind just how irritated you were when you were simply asked anything and in the middle of the answer were not able to produce additionally-- this is really necessary since it it achievable reaching the limit might just potentially annoy the visitors and push them out of sending the form as well as from the webpage itself.
Representations
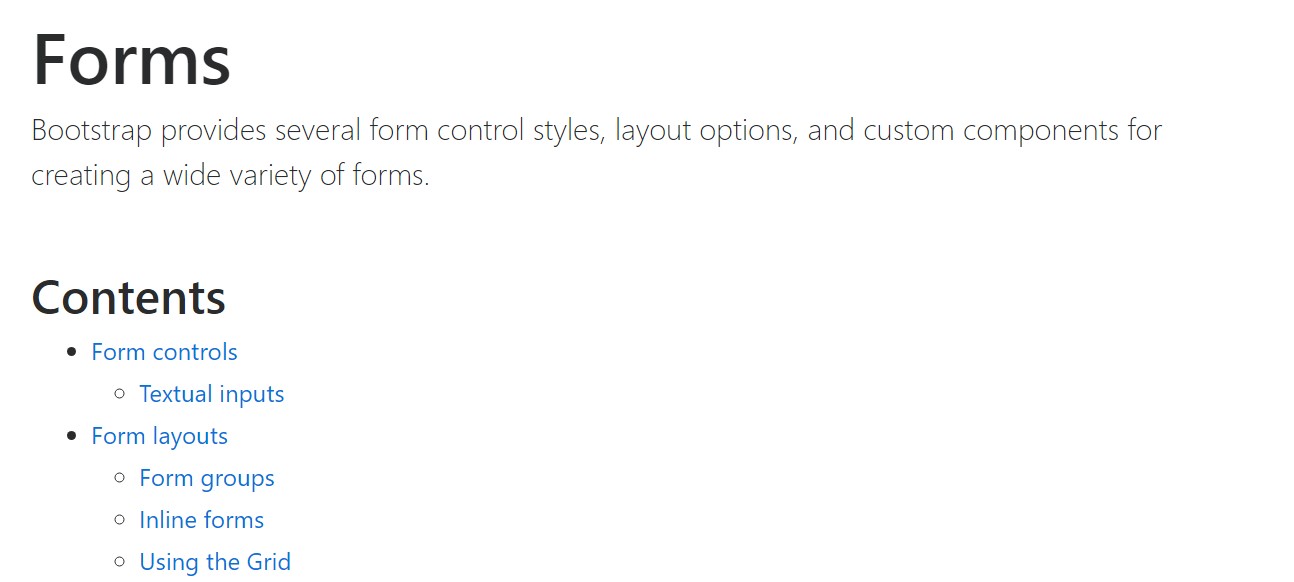
Bootstrap's form controls expand on Rebooted form styles with classes. Work with these particular classes to opt into their modified displays for a even more steady rendering throughout devices and web browsers . The example form listed here demonstrates usual HTML form elements that get upgraded looks from Bootstrap with added classes.
Bear in mind, given that Bootstrap utilizes the HTML5 doctype, all of the inputs need to have a type attribute.
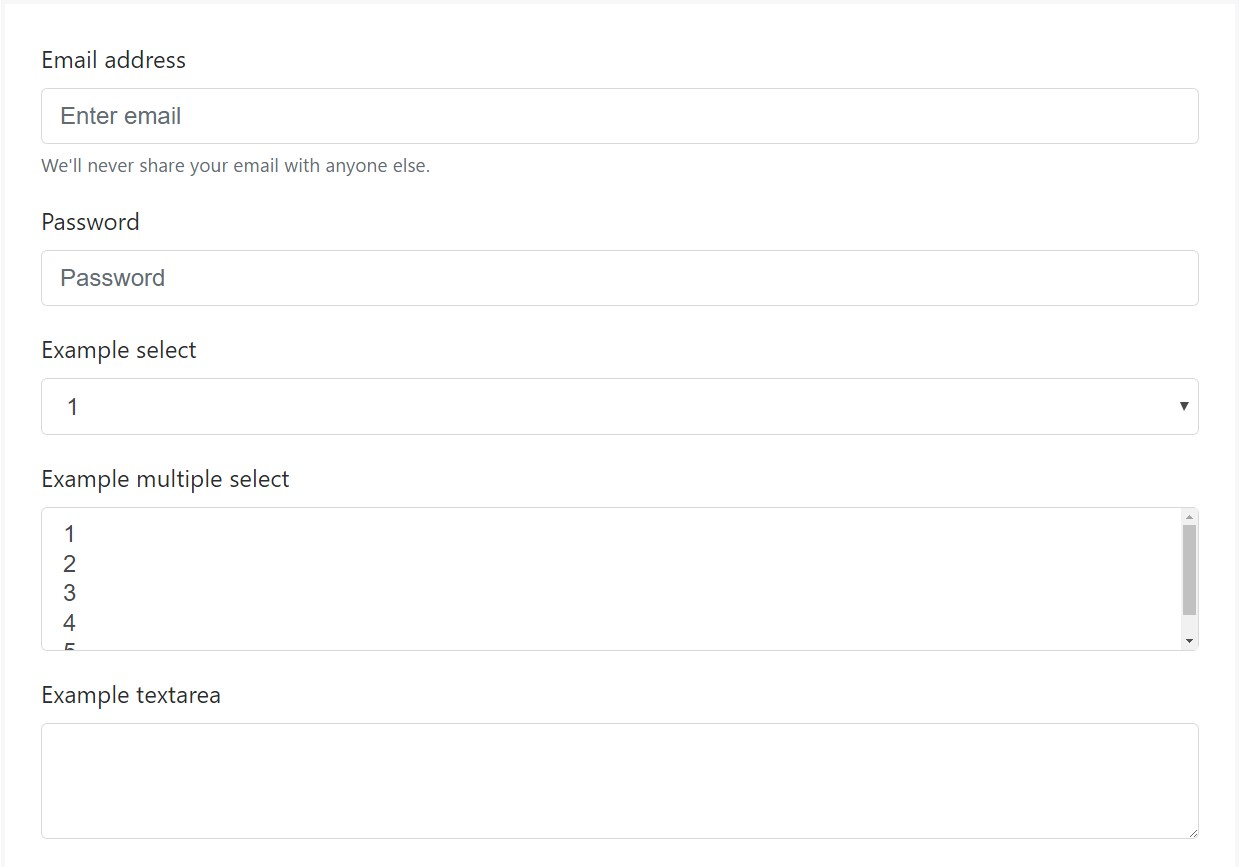
<form>
<div class="form-group">
<label for="exampleInputEmail1">Email address</label>
<input type="email" class="form-control" id="exampleInputEmail1" aria-describedby="emailHelp" placeholder="Enter email">
<small id="emailHelp" class="form-text text-muted">We'll never share your email with anyone else.</small>
</div>
<div class="form-group">
<label for="exampleInputPassword1">Password</label>
<input type="password" class="form-control" id="exampleInputPassword1" placeholder="Password">
</div>
<div class="form-group">
<label for="exampleSelect1">Example select</label>
<select class="form-control" id="exampleSelect1">
<option>1</option>
<option>2</option>
<option>3</option>
<option>4</option>
<option>5</option>
</select>
</div>
<div class="form-group">
<label for="exampleSelect2">Example multiple select</label>
<select multiple class="form-control" id="exampleSelect2">
<option>1</option>
<option>2</option>
<option>3</option>
<option>4</option>
<option>5</option>
</select>
</div>
<div class="form-group">
<label for="exampleTextarea">Example textarea</label>
<textarea class="form-control" id="exampleTextarea" rows="3"></textarea>
</div>
<div class="form-group">
<label for="exampleInputFile">File input</label>
<input type="file" class="form-control-file" id="exampleInputFile" aria-describedby="fileHelp">
<small id="fileHelp" class="form-text text-muted">This is some placeholder block-level help text for the above input. It's a bit lighter and easily wraps to a new line.</small>
</div>
<fieldset class="form-group">
<legend>Radio buttons</legend>
<div class="form-check">
<label class="form-check-label">
<input type="radio" class="form-check-input" name="optionsRadios" id="optionsRadios1" value="option1" checked>
Option one is this and that—be sure to include why it's great
</label>
</div>
<div class="form-check">
<label class="form-check-label">
<input type="radio" class="form-check-input" name="optionsRadios" id="optionsRadios2" value="option2">
Option two can be something else and selecting it will deselect option one
</label>
</div>
<div class="form-check disabled">
<label class="form-check-label">
<input type="radio" class="form-check-input" name="optionsRadios" id="optionsRadios3" value="option3" disabled>
Option three is disabled
</label>
</div>
</fieldset>
<div class="form-check">
<label class="form-check-label">
<input type="checkbox" class="form-check-input">
Check me out
</label>
</div>
<button type="submit" class="btn btn-primary">Submit</button>
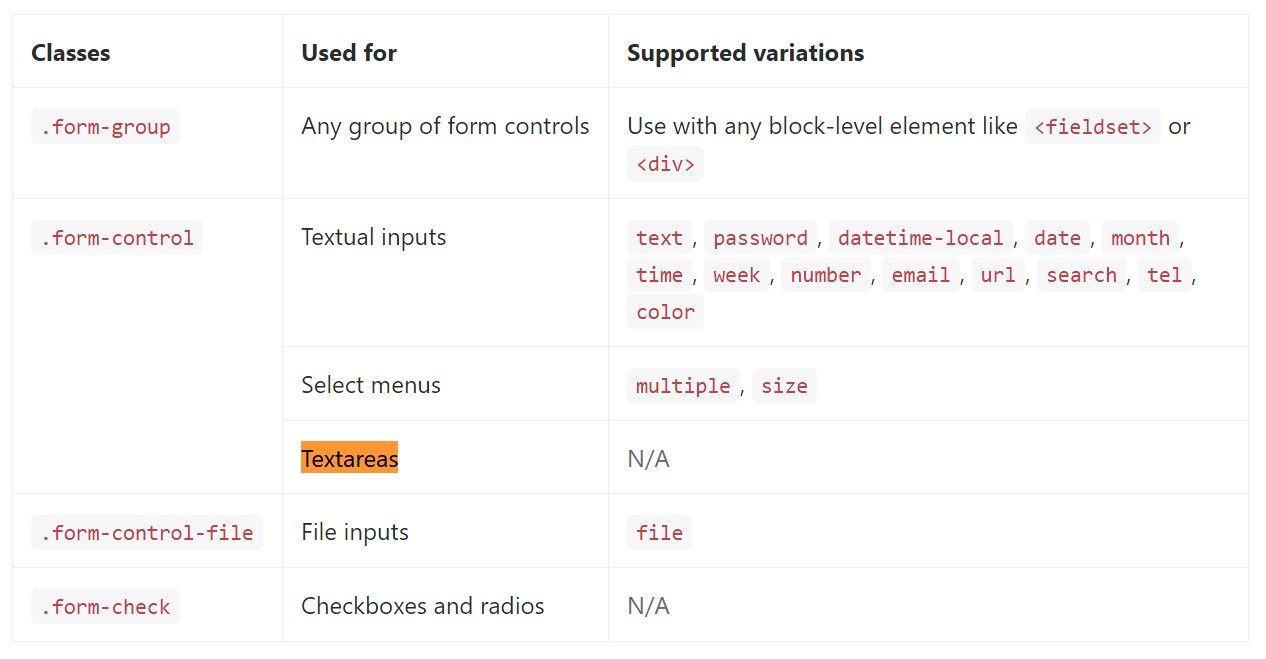
</form>Here is generally a complete listing of the certain form commands assisted simply by Bootstrap and the classes that customize them. Additional documentation is accessible for every group.
Conclusions
And so now you find out the best ways to develop a <textarea> element in your Bootstrap 4 powered website page-- right now all you really need to find out are the appropriate questions to ask.
Inspect a couple of youtube video tutorials relating to Bootstrap Textarea Modal:
Linked topics:
Concepts of the textarea
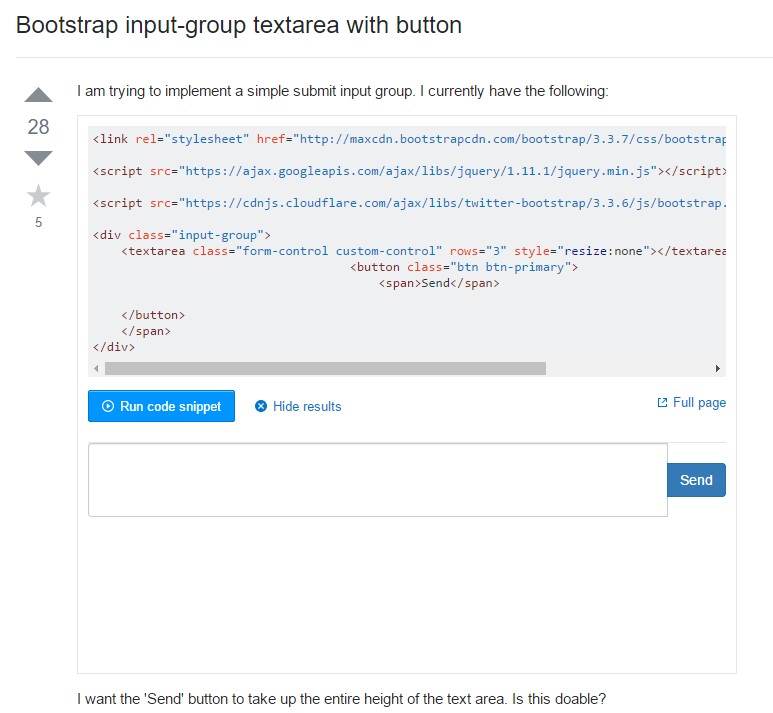
Bootstrap input-group Textarea button together with
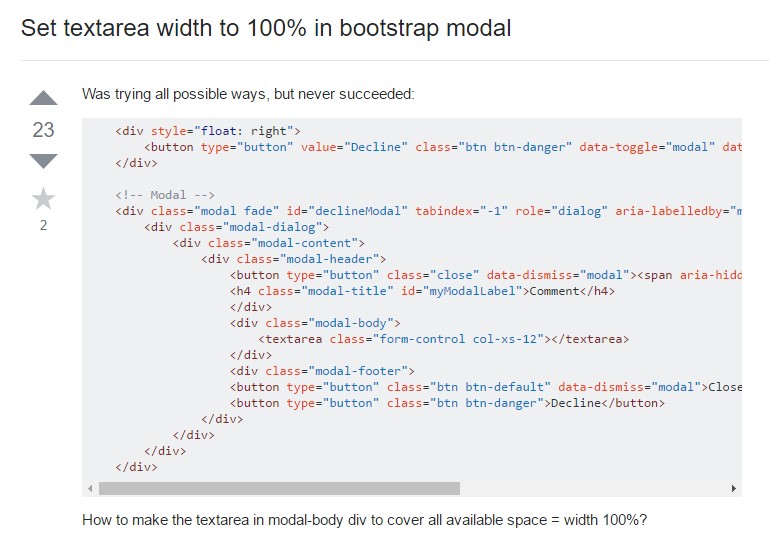
Install Textarea width to 100% in Bootstrap modal