Bootstrap Popover HTML

Intro
The versions
Bootstrap belongs to the most handy and free of cost open-source programs to produce websites. The current version of the Bootstrap operating system is known as the Bootstrap 4. The system is at the moment in the alpha-testing period nevertheless is easily accessible to internet builders worldwide. You are able to even develop and suggest improvements to the Bootstrap 4 before its final version is delivered.
Usage of the Bootstrap 4
Using Bootstrap 4 you may create your site now faster than ever. It is comparatively really simpler to work with Bootstrap to design your site than other programs. By having the integration of HTML, CSS, and JS framework it is one of the most favored platforms for web site development.
Certain functions and tips in Bootstrap 4
A couple of the greatest functions of the Bootstrap 4 feature:
• An improved grid system which enables the user to obtain mobile device responsive along with a fair amount of simplicity.
• Several utility instruction sets have been featured in the Bootstrap 4 to promote very easy learning for beginners in the business of web building.
Facts to note
Step 2: Rewrite your article by highlighting words and phrases.
Together with the start of the brand-new Bootstrap 4, the ties to the earlier version, Bootstrap 3 have not been totally removed. The programmers have guaranteed that the Bootstrap 3 does get periodic upgrade and error fixes together with enhancements. It will be accomplished even after the ultimate produce of the Bootstrap 4.
Differences comparing Bootstrap 4 and Bootstrap 3
• The service for a variety of web browsers including running systems has been featured in the Bootstrap 4
• The overall sizing of the font is boosted for comfortable reading and website construction experience
• The renaming of several elements has been completed to ensure a faster and more trusted web-site development process
• Through brand-new customizations, it is feasible to develop a more interactive website along with nominal efforts
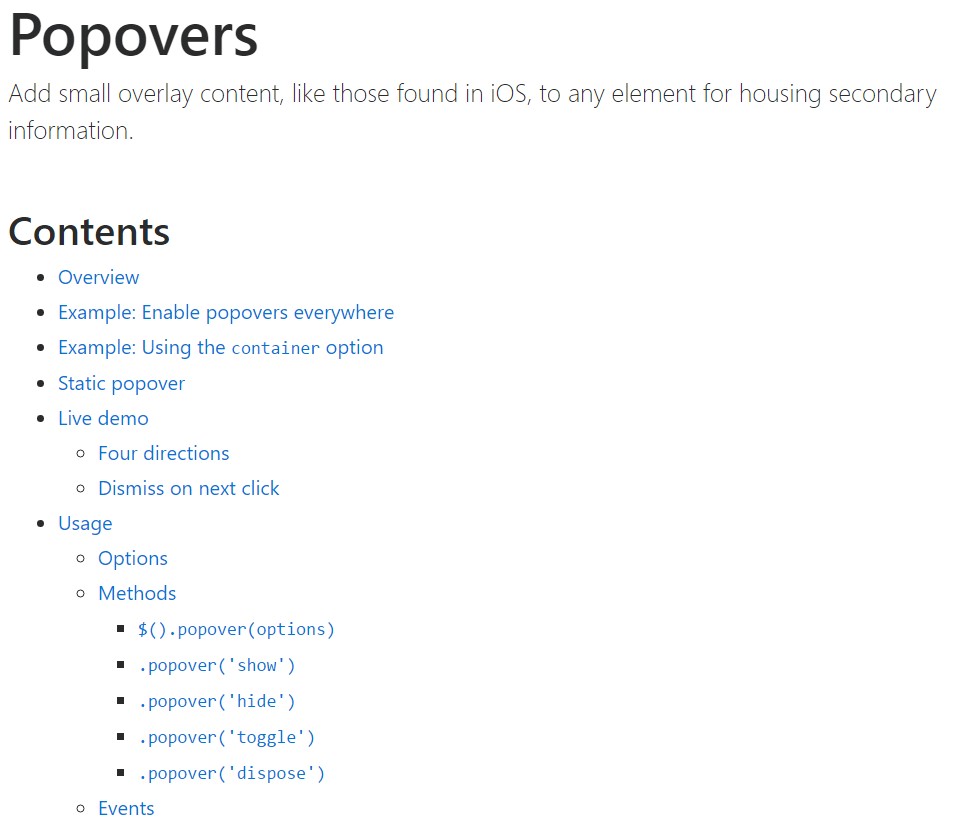
Bootstrap Popover Options
And now let us reach the main theme.
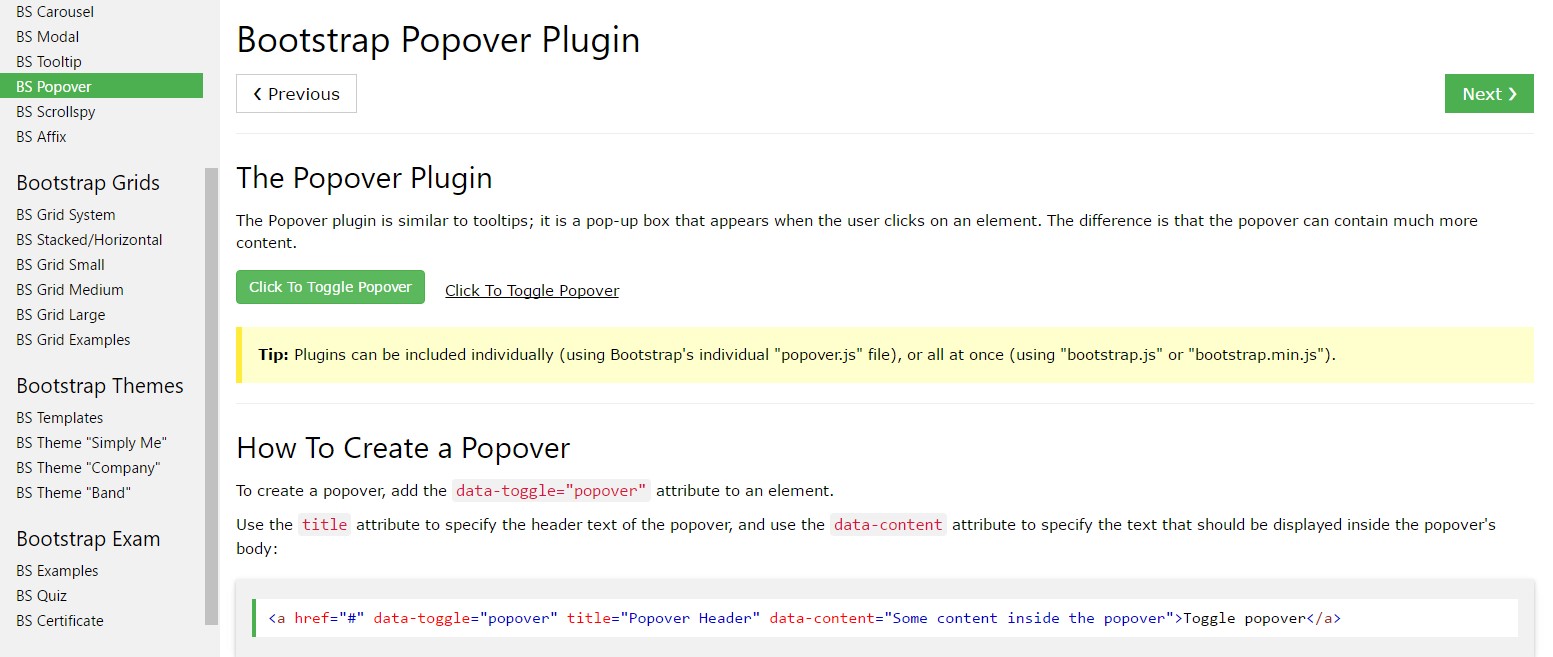
In the case that you really want to add in some extra data on your website you can possibly work with popovers - simply include small overlay content.
Tips on how to put into action the popover plugin:
- Bootstrap Popover Content rely upon the 3rd side library Tether for setting. You have to include tether.min.js right before bootstrap.js in order for popovers to run!
- Popovers need the tooltip plugin considering that a dependency .
- Popovers are opt-in for effectiveness causes, in this way you have to initialize them yourself.
- Zero-length title and content values will definitely never reveal a Bootstrap Popover HTML.
- Identify container:'body' to evade rendering problems in more complex components (like Bootstrap input groups, button groups, etc).
- Activating popovers on hidden features will not get the job done.
- When triggered directly from website links that span multiple lines, popovers will certainly be centered. Work with white-space: nowrap; on your <a>-s to eliminate this particular actions.
Did you gotten the idea? Fantastic, let us discover exactly how they perform using some good examples.
You will need to incorporate tether.min.js just before bootstrap.js in order for popovers to perform!
Good example: Set up popovers everywhere
One practice to activate all popovers in a web page would be to pick them by their data-toggle attribute:
$(function ()
  $('[data-toggle="popover"]').popover()
)
For example: Employing the container possibility
Anytime you obtain several designs on a parent element that meddle with a popover, you'll desire to define a custom container to make sure that the popover's HTML appears in that component as an alternative.
$(function ()
$('.example-popover').popover(
container: 'body'
)
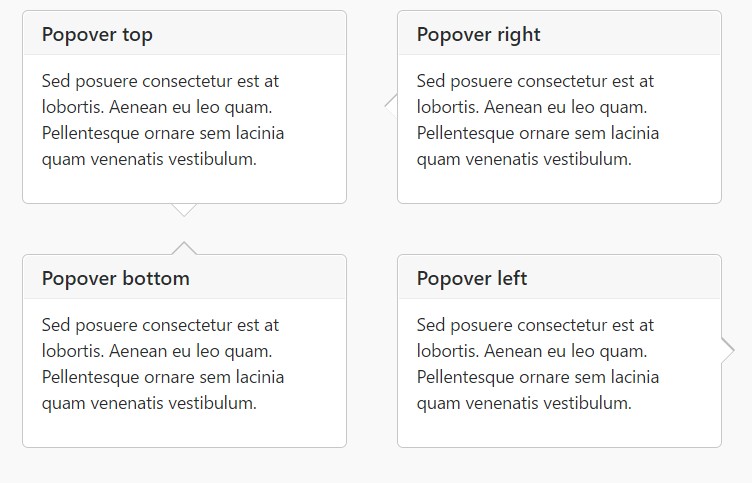
)Static popover
Four possibilities are accessible: high point, right, bottom, and left adjusted.
Live demonstration
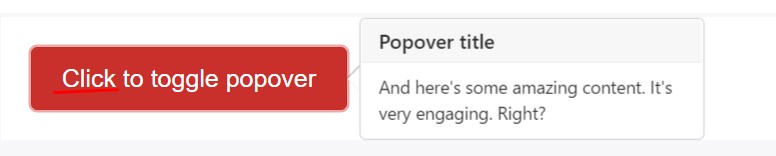
<button type="button" class="btn btn-lg btn-danger" data-toggle="popover" title="Popover title" data-content="And here's some amazing content. It's very engaging. Right?">Click to toggle popover</button>Four courses
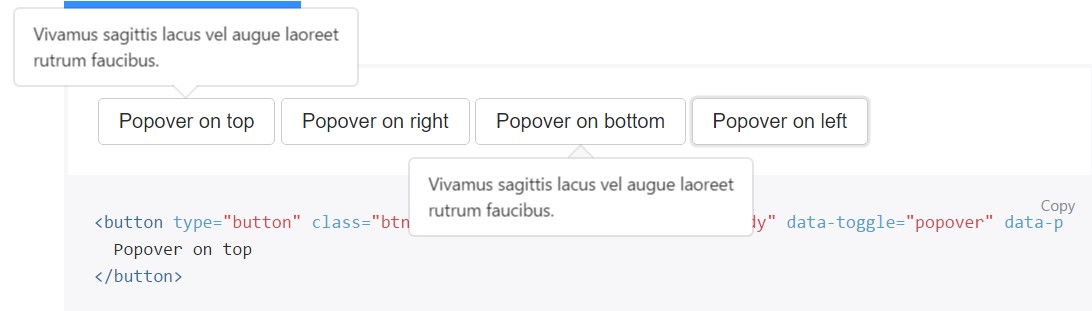
<button type="button" class="btn btn-secondary" data-container="body" data-toggle="popover" data-placement="top" data-content="Vivamus sagittis lacus vel augue laoreet rutrum faucibus.">
  Popover on top
</button>

<button type="button" class="btn btn-secondary" data-container="body" data-toggle="popover" data-placement="right" data-content="Vivamus sagittis lacus vel augue laoreet rutrum faucibus.">
  Popover on right
</button>

<button type="button" class="btn btn-secondary" data-container="body" data-toggle="popover" data-placement="bottom" data-content="Vivamus
sagittis lacus vel augue laoreet rutrum faucibus.">
  Popover on bottom
</button>

<button type="button" class="btn btn-secondary" data-container="body" data-toggle="popover" data-placement="left" data-content="Vivamus sagittis lacus vel augue laoreet rutrum faucibus.">
  Popover on left
</button>
Dismiss on following mouse click
Work with the focus trigger to dismiss popovers on the next hit that the user does.
Certain markup demanded for dismiss-on-next-click
For effective cross-browser and cross-platform behaviour, you need to apply the <a> tag, not the <button> tag, plus you additionally have to provide a tabindex attribute.

<a tabindex="0" class="btn btn-lg btn-danger" role="button" data-toggle="popover" data-trigger="focus" title="Dismissible popover" data-content="And here's some amazing content. It's very engaging. Right?">Dismissible popover</a>$('.popover-dismiss').popover(
trigger: 'focus'
)Application
Permit popovers through JavaScript
$('#example').popover(options)Features
Options may possibly be passed with data attributes or else JavaScript. For information attributes, add the option name to data-, as in data-animation="".

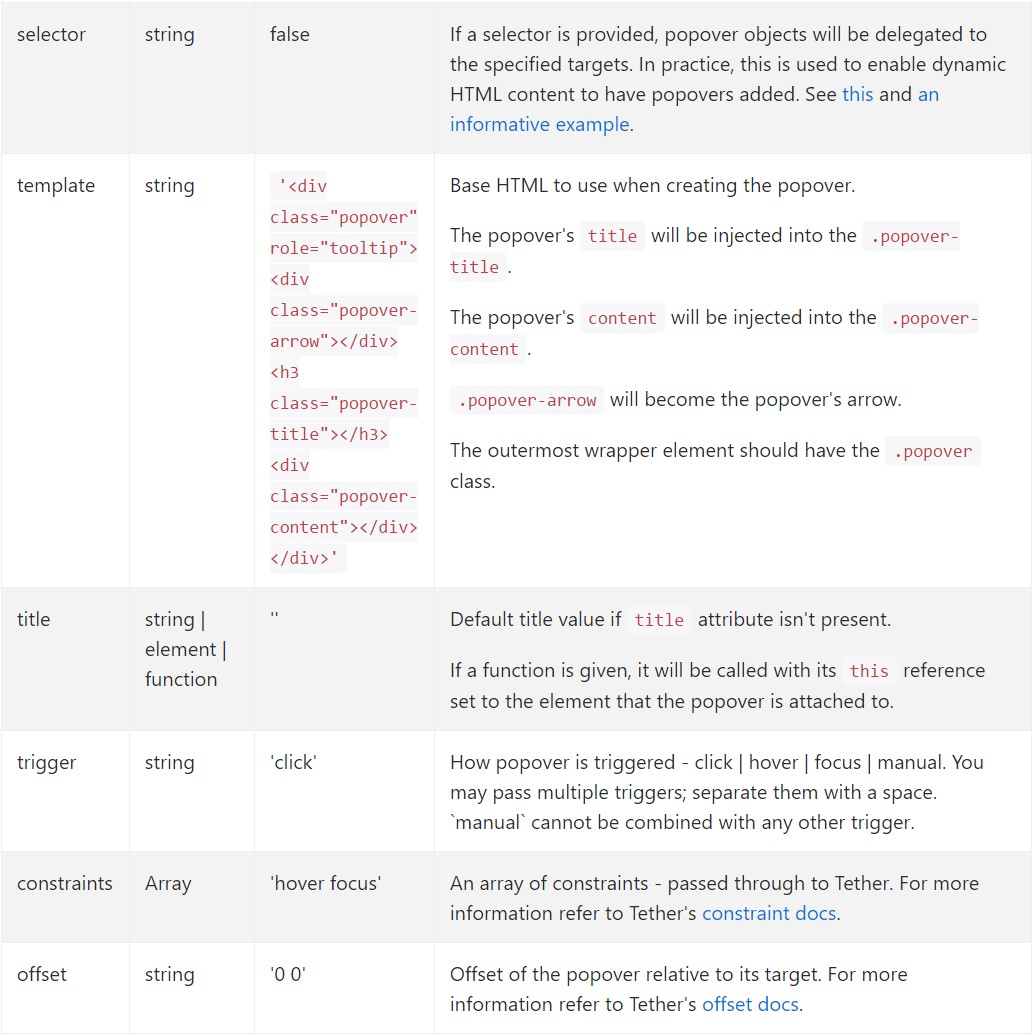
Data attributes for specific popovers
Options for particular popovers may alternatively be specified throughout the usage of data attributes, being described above.
Methods
$().popover(options)
Initializes popovers with regard to the element collection.
.popover('show')
Shows an element's popover. Go back to the user before the popover has really been presented (i.e. prior to the shown.bs.popover event happens). This is regarded as a "manual" triggering of the popover. Popovers whose each title and web content are zero-length are never shown.
$('#element').popover('show')
.popover('hide')
Conceals an element's popover. Go back to the caller right before the popover has really been concealed (i.e. right before the hidden.bs.popover event takes place). This is considered a "manual" triggering of the popover.
$('#element').popover('hide')
.popover('toggle')
Toggles an element's popover. Comes back to the user before the popover has actually been presented or disguised (i.e. prior to the shown.bs.popover or hidden.bs.popover activity takes place). This is regarded a "manual" triggering of the popover.
$('#element').popover('toggle')
.popover('dispose')
Conceal and gets rid of an element's popover. Popovers that put into action delegation (which are built making use of the selector feature) can not really be personally wiped out on descendant trigger elements.
$('#element').popover('dispose')
Events

$('#myPopover').on('hidden.bs.popover', function ()
  // do something…
)
Inspect several youtube video tutorials regarding Bootstrap popovers
Linked topics:
Bootstrap popovers official records
Bootstrap popovers tutorial
Bootstrap Popover problem

$().popover(options)
Initializes popovers with regard to the element collection.
.popover('show')
Shows an element's popover. Go back to the user before the popover has really been presented (i.e. prior to the shown.bs.popover event happens). This is regarded as a "manual" triggering of the popover. Popovers whose each title and web content are zero-length are never shown.
$('#element').popover('show').popover('hide')
Conceals an element's popover. Go back to the caller right before the popover has really been concealed (i.e. right before the hidden.bs.popover event takes place). This is considered a "manual" triggering of the popover.
$('#element').popover('hide').popover('toggle')
Toggles an element's popover. Comes back to the user before the popover has actually been presented or disguised (i.e. prior to the shown.bs.popover or hidden.bs.popover activity takes place). This is regarded a "manual" triggering of the popover.
$('#element').popover('toggle').popover('dispose')
Conceal and gets rid of an element's popover. Popovers that put into action delegation (which are built making use of the selector feature) can not really be personally wiped out on descendant trigger elements.
$('#element').popover('dispose')Events
$('#myPopover').on('hidden.bs.popover', function ()
// do something…
)Inspect several youtube video tutorials regarding Bootstrap popovers
Linked topics:
Bootstrap popovers official records
Bootstrap popovers tutorial
Bootstrap Popover problem